How many times have you cherished the capture of a memorable fish only to have to commit it to a dusty corner in your memory banks because either you were alone or you didn’t have a camera with you? Or Joe Bloggs took a picture for you and you couldn’t tell the resulting print from a Jackson Pollock? Okay, some would protest that the rose-tinted memory is all they need and I wouldn’t argue with that. Though I suspect even more would prefer a well-taken photograph to record the moment and with which to bore the grandchildren.
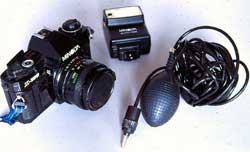
Cameras Of course a prerequisite for taking a good picture is to own a camera. Because this is a fishing site and not a photography one I will not go deep into the realms of camera formats. This article is aimed at those who already own a film camera, or are looking to purchase an economical set-up that will produce top quality pictures. Digital photography will become more common as emulsion (film) standards are matched with ‘like for like’ costs. At the moment though you would have to spend considerably more on a digital set-up than you would for a good quality second-hand film camera, in order to achieve the same quality prints. I would also suggest that unless you have a very large budget and intend to become very serious about your photography you would be best advised to stick to 35mm format. This could be simple compact, where all you need do is frame the picture and focus. Modern compacts will deliver an acceptable picture in the majority of situations. However, should you wish to cover those situations where a compact will struggle, or you wish to have a degree of control over the picture-taking process, you will need a camera with manual override facilities and typically one with interchangeable lenses. There are reasonably priced cameras on the market that can boast a multitude of modern features and, if used competently, will reproduce top quality photographs. However, there are a couple considerations to be made. For a start, one person’s idea of reasonable cost may be vastly different to another. Secondly, cameras that host lots of functions, unless you buy at the expensive top end of the market, usually do so at the sake of ‘build quality’ and are seldom very robust. Obviously, your average angler, who is likely to cart the camera amongst his tackle across rough ground in damp conditions, doesn’t want to hear this.
Film Film comes in two main formats, slide and print. Slide film produces slides or transparencies, so often used in conjunction with a projector for seminars or presentations. It is also the medium used by most professional photographers as it reproduces in magazine or book form to a far higher standard than print film. On the down side it is far less forgiving of error on the users part and isn’t easy to get good prints from for the album. Print, or negative film, on the other hand, is much more forgiving of errors in exposure and can produce excellent prints for the home album but loses more in book or magazine reproduction. For the average angler I would say print film is the logical choice, but those wishing to write articles would do well to aspire to the proficiency level required to work with slide film. The most important issue relating to film of either kind is its speed. Film is categorized by the speed with which it reacts to light. The slowest films are typically 50 ASA or 50 ISO (the letters aren’t important) and progress in speed right up to 3200 ASA (ISO) and beyond.
Basic Photography It is vital to have an understanding of the basic principles of photography in order to consistently produce good pictures. At its simplest a camera is a light-tight box that allows light to fall through a hole of a predetermined size onto the surface of a film for a given period of time. These two elements, the length of time the film is subjected to light and the size of the ‘aperture’ the light is allowed to pass through are key to the process. The ‘shutter’ opens and closes for a controlled period of time (shutter-speed) and allows light to pass through the lens and onto the light sensitive film. In the lens is an adjustable diaphragm that controls the ‘aperture’, which is also referred to as the f-stop. On the majority of cameras a knurled ring on the lens makes the necessary adjustment and is commonly numbered anywhere from f1.8 up to f22 each number represents an f-stop. Without getting too bogged down, there are three critical things you need to remember regarding these numbers. Firstly, and rather perversely, the greater the numerical value the smaller the aperture i.e f22 is a smaller hole or aperture than f1.8. Secondly, each time you increase or decrease the aperture the shutter speed doubles or halves respectively. Third, and probably most importantly of all, the smaller the aperture (or the greater the f-stop number) the greater the, ‘depth of field,’ that is the zone of sharp focus in front of and beyond the subject. Exposure Cameras like the ones recommended earlier have built-in light meters that read the reflected light from the scene and tell you what exposure is required for a picture. In most situations this ‘metering’ is correct and all you need do is compose your picture in the frame, focus and shoot. However, there are times, particularly when the scene viewed has a wide contrast between the shadowy, darker areas and the brighter highlight areas when the cameras meter may be tricked into thinking a scene is brighter or darker than it is. In these cases the exposure indicated may be wrong and the resulting pictures will have either ‘burnt out’ (overexposed) highlights or too dark (underexposed) shade or shadow areas. This is when the experienced photographer may make the decision to override the cameras light meter and shoot in ‘Manual mode’.
For instance, if he wishes to hold the camera by hand then the photographer is limited to a shutter speed of about a 60th of a second or above. This is because any slower and the picture is likely to blur through incidental camera movement. So, at a 60th of a second the camera’s built in light meter may suggest an aperture of, say f8. However, the angler decides that because it is a windy day he needs to use a faster shutter speed to eliminate camera movement even further. By changing the aperture to f5.6 he has doubled the shutter speed and can now use a 125th of a second. He has also, as a consequence, decreased the depth of field. As I said earlier there is a trade-off to be made between picture quality and available shutter speed. By using a faster film you lose something in picture quality but you gain in available exposure values. The simple rule is that every time you double the film speed you gain one aperture number. If the angler in the example above was using 100 ASA film a change to 200 ASA film would give him the opportunity to change from f5.6 to f8 or from 125th of a second to 250th of a second. With advances in modern film manufacture, grain is not the issue it once was and 200 ASA film produces excellent picture quality in both slide and print film. This would be the film speed I would recommend the angling photographer make his standard stock. Added to this, when faced with extremely low light levels or extremely bright ones, the 200 ASA film can be up or down-rated to either 400 or 100 ASA. This means you dial a false reading of 400 or 100 into the cameras film speed setting. When the film is processed you must inform the lab that you have up or down-rated the film to the relevant speed and for a small extra fee, typically about £ 2 per film, they will process it accordingly. This means you don’t have to carry a wide range of films with you to meet all conditions. Remember though, if you do not tell the lab before they process your film your pictures will be under or over exposed! Photographing fish Many things can detract from your angling portraits but there are three main factors that, if not attended to correctly, can ruin them completely. Those are, framing, focusing and exposure. Framing It sounds simple doesn’t it? You look through the viewfinder, focus the camera and take the picture. Why then do I witness so many magnificent fish rendered into either a speck in the distance or missing their tail’s or their snout? Or the accompanying angler has his head chopped off above the eyes or stands to one side of the picture with a yard of unwanted, uninteresting space to his side? Excitement and panic can be the main contributors; trembling with adrenaline from an epic fight the angler finds it difficult to concentrate or think straight. The fish is hurriedly weighed, photographed and returned and it is not until the expectant angler queues up in Boots for his prints three days later that the disappointment hits. A far better idea is to sack the fish momentarily while you organize your camera and stuff. This gives you and the fish a brief chance to settle down from the bristling rage of battle. Not too long mind or the fish will be ready for round two, not a scenario you want while attempting to photograph her.
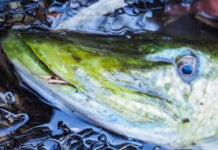
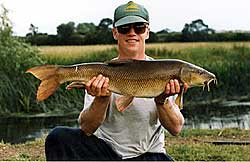
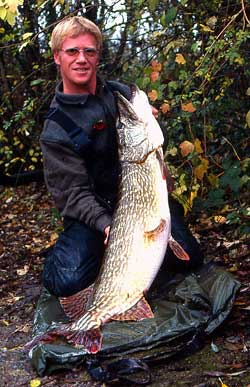
Landscape or Portrait? Landscape is when the camera is positioned so that the longest length of the frame runs parallel to the ground or sky. Portrait is when the photographer turns the camera through 90 degrees and the longest length of the frame now runs from ground to sky. I have to admit I’ve got tunnel vision on this one and nearly all of my straight portrait shots are shot in this format; it lends itself very well to a pike’s long shape when held vertically and allows the picture taker to close in as tight as possible. Landscape shots always look to have wasted space for me, unless you’re photographing the long shape of a barbel say, held horizontally. Probably the best idea is to take a couple of shots in both formats. Focusing Of course you only need to focus sharply on your subject at the simplest end but there are a couple of pitfalls aside from that. Probably the major concern is depth of field. When lighting conditions are low you may be forced into using your camera’s widest aperture (smallest f-number). At the widest aperture the depth of field is at its shallowest and this can mean that although the camera is sharply focused on your subject’s face the fish, which lays closer to the camera, may be out of the zone of sharp focus and hence blurred. In this situation you need to maximize your depth of field. Imagine the fish and angler in front of you as a three dimensional picture. Now make the point you focus sharply on where you estimate to be a third of the way into the picture. The reason for doing this is because the sharp zone of focus extends from a third in front of the focusing point and two thirds beyond it. The other solution would be to decrease the size of the aperture and hence increase the depth of field, but this may mean needing a tripod as the ensuing shutter-speed may be too slow to hand-hold the camera. Exposure Considerations when Photographing in Bright conditions I know I’ve waffled on about exposure somewhat already but it is arguably the most difficult factor to get consistently right. In the case of pike, in particular, there is one valuable lesson I have learned regarding exposure. On bright days in particular there is a quandary. The contrast in your prospective picture may be beyond the ‘exposure latitude of the film.’ Without complicating matters too much this means the film cannot cope with the variance between the shadow areas and highlights of your picture. This may result in either a picture correctly exposed in the shadow areas yet washed or burnt out in the highlights or correctly exposed in the highlights and overly dark in the shadow. Unfortunately sometimes you have to compromise when photographing high contrast shots and aim for somewhere in the middle. Photographing pike in these conditions has its own particular problem. A pike’s coloration scheme is in itself a conflict of contrast. On the one hand its beautiful mottled green back needs enough exposure to truly do justice to that deep bottle green. Conversely its pale white stomach and chin will have washed out slightly (or over-exposed) if given the same amount of exposure. Indeed a vast amount of great pike pictures I have seen (including many of my own) are perfect except for a bleached look to the pike’s stomach. In normal lighting conditions this problem may be largely overcome by a carefully considered exposure. The method best employed for this is known as bracketing exposures and this is where you will need to use your camera in manual mode. For example lets say the camera’s light meter is suggesting an exposure of 125th of a second at f8 the photographer takes the shot then sets the camera to manual mode. Now they dial in 125th of a second at f5.6 and retake the shot. A third shot is taken at 125th of a second at f11 they have now bracketed one stop either side of the cameras reading. It’s a bit like using a shotgun rather than a rifle. In practice its preferable, if your camera allows it, to bracket by half stops with print film and third stops with slide film.
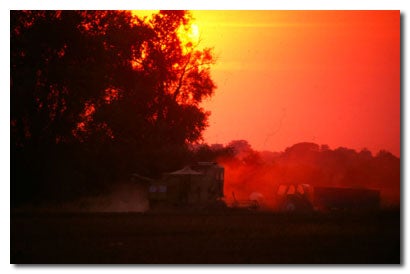
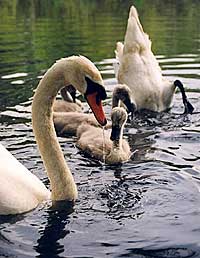
Using Flash in Day-light There is one other weapon that we can use to overcome the problems of contrast on bright days and it can be highly effective. Most people will be aware that flash can be used at night or in very low light levels but few I would venture would realize it can be used in bright conditions to stabilize high contrast. A small burst of flash can light up those areas of a high contrast picture that are in deep shadow and balance the difference between the darker and lighter areas. This technique is known as ‘fill-in flash.’ Another useful attribute of flash is the ability to ‘warm’ your pictures up slightly. On dull grey days you may have enough light for correct exposure but your results may look a little dull and flat, due in this case to low contrast conditions. A little flash can warm the colours and lift the contrast a little. It would not be fair for me to go into any depth on the subject of flash, as I am still on a huge learning curve myself in this area of photography. Suffice to say I use a dedicated flash with my camera and let the automatic process carry me through. As a final thought I would urge you not just to leave your camera gathering dust in your tackle bag while you wait for that next double. We anglers spend our days in some of the most breathtaking outdoor studios imaginable. Wildfowl, wildlife, exquisite flowers, plants and vividly coloured insects, shimmering sunrises and blood-red sunsets. It all passes before our privileged eyes. Incidental pictures can make powerful and poignant reminders of great days and enrich the pages of your fishing albums. So go on, get snapping! Next week we have a guide to digital photography by Paul Tyer, Managing Director of www.lightimages.co.uk Ltd. |
Welcome!Log into your account


