I was asked if I could put together a small tutorial as to how I create floats, so I’ve put together this to allow other amateur float makers and anglers to see how I create and construct my floats. I don’t claim to be a professional floatmaker and there are many other floatmakers out there far better than myself.
I got into floatmaking through an elderly gentleman who I grew up beside and I find it relaxing making them and also greatly satisfying when you see fish being caught with the aid of something that you have created from scratch.
If you’re looking at making your own floats in the future may I suggest a few publications you should try to get hold of. I use many other publications, too many to list, but the ones I have mentioned would be the backbone of the floatmakers library. They are a wealth of information and if you’re looking at making traditional floats then they are an absolute godsend, although most of them are now out of publication, you will find them if you carry out an internet search. (Also check with your local library – Ed.)
 On the left 4 publications by the World Champion Billy Lane and on the right the Floatmakers Manual by Bill Watson, The Float By Keith Harwood and finally an old Ultra Floats Catalogue which of course was originally Billy Lane’s designs.
The Process –
I have chosen a cork on cane to illustrate as its a more traditional float to make than current day balsa’s and more pleasing to create, but the same principles are used for any body floats I create either in cork or balsa.
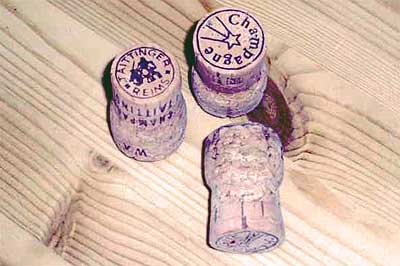
1. The Raw Material. This is how the cork on Cane starts its life as a used champagne cork, these can be picked up on the internet or ask your local bar or club to save them for you after their parties.
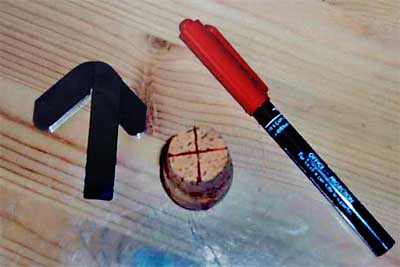
2. Finding Centre. The first thing I do is find the centre of the cork and mark it ready for drilling, I do this with the means of a tool which is used for model making and woodturning, marking centre both on the top and the bottom for precision, that way I know when drilling I haven’t gone off at an angle.
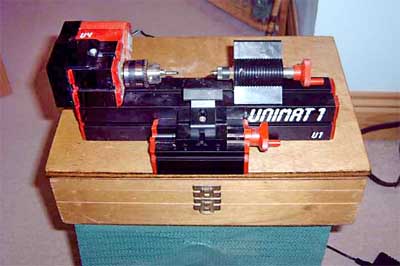
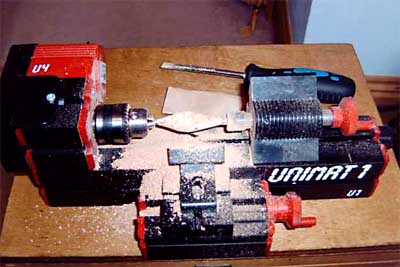
3. The Equipment. I recently bought a model makers wood turning lathe which I now use to turn the float bodies making it much easier to control the shapes for the float bodies. As you can see from the picture I have mounted it on an old wooden float box which I now use to store the various tools and parts required in the process. Before buying the lathe I used to turn the bodies on an old power drill with a clamp attachment to my workbench in the shed, now I can bring it all indoors as it’s small & compact enough for my computer/study room.
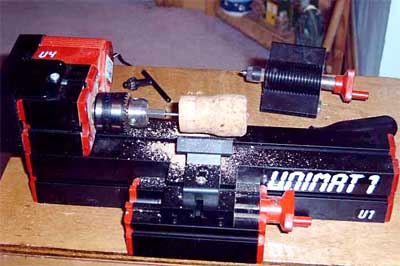
4. Drilling Out. The next stage in the process is drilling out the centre of the cork to allow the float stem to be pushed through the cork, I prefer to push a complete stem through the float rather than cut the stem and just glue them at the top & bottom as this gives strength to the float and the whole length of the cork.
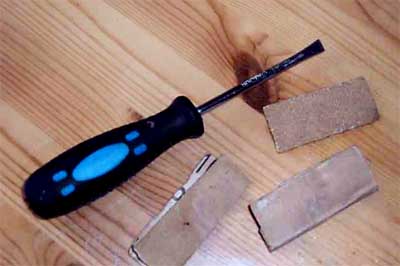
5. Tools. The tools I use to turn the float body are nothing flash or expensive. I use an old screwdriver which I have ground down to form a cutting edge. This I use to turn the float down until I get the basic shape before I continue with various grades of sandpaper to get the final shape and texture.
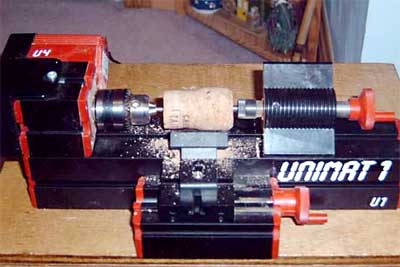
6. Creating the Body. The next couple of photographs show the cork being turned down from its original shape to the shape I want for the float body.
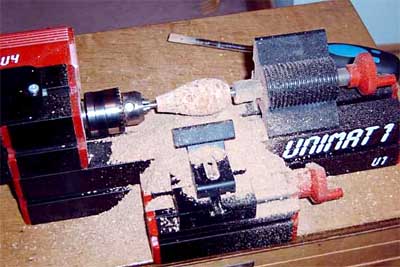
Turned down using Screwdriver
Finally shaped using various grades of sandpaper. (You might want to wear a dust mask for this part of the process – Ed.)
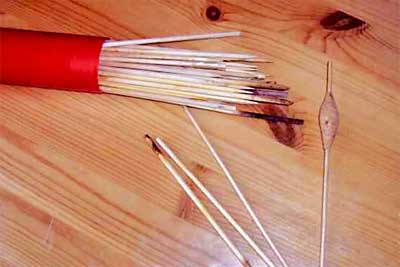
7. Choosing a Float Stem. Next part of the process is to chose a stem to match the float, I like to use quills as well as cane. I have been lucky with my quills as I know several gamekeepers on local estates who supply me with most of my quills. However you do find a lot whilst walking the river bank, recently I was walking the bank and found the carcass of a goose recently deceased, I managed to get over 25 usuable wing quills from it.
The cane I use is recycled skewers from food products. Nowadays most skewers are made from bamboo, but over the years I’ve managed to collect a number of proper cane skewers and if you shop around some can still be found on food products. Once the appropriate stem is found it is cut to size then glued in place and allowed to set.
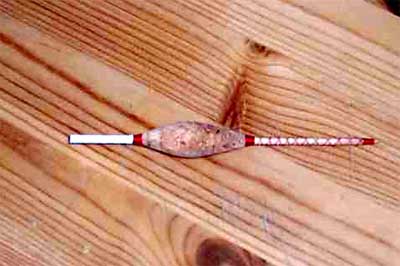
8. Whipping and Undercoat. This is where the float really starts to take shape by adding silk whipping, this is purely a technique that you have to master yourself and with time and practice you will learn to whip neatly and hide all tags of thread and by experimenting you can create different visual whippings on a float. This technique was originally designed to bind & secure the float together before the days of glue. Once the whipping is in place I always paint a white undercoat before applying the colour, this enhances the final colour in my opinion.
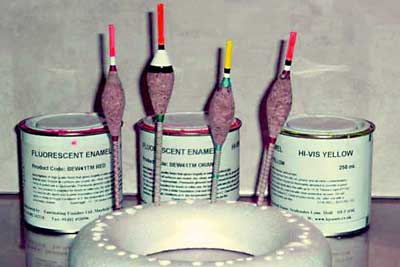
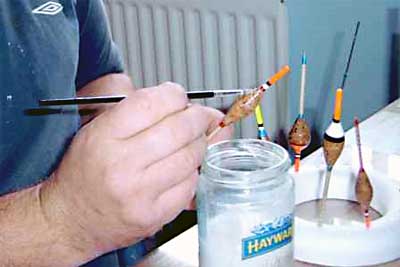
9. Painting. This is probably my least favourite part of creating floats as a steady hand is required and I’m no artist. I prefer to paint freehand than use any dipping methods or other ways of applying the paint. I have tried various methods used in books and recommended by other makers, but always come back to freehand. I use 3 fluorescent colours for my float tips, red, orange & yellow. The picture shows the painted float along with others being painted in my polystyrene drying ring which I procured from my wife’s craft box.
10. Lacquering. I prefer to use a waterbased lacquer which has a 10% sheen, rather than a marine varnish, for a number of reasons, a few of which are:
- Its waterbourne and can be washed out of the brush with water, so less mess and no jars of thinners around to clean brushes.
- It doesnt cloud the true texture and colour of the float as some varnishes do even though they are meant to be clear.
- If a mistake is made then it is easily wiped off unlike varnish which sticks to everything.
- Its more durable than varnish and doesn’t peel or flake after a few seasons continuous use.
- The 10% sheen of the lacquer doesnt make the float shiny like marine varnish does.
All my floats are given on average 7 coats of lacquer with 12 – 24 hours drying time between coats. The lacquer is normally dry in 3 to 4 hours, but I prefer to leave it longer. This is only due to making the floats in my spare time after work.
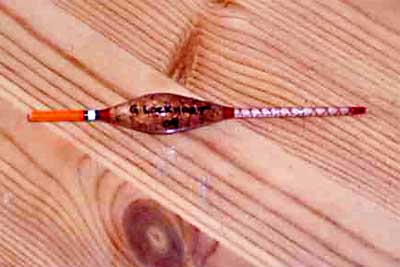
11. Signature and Date. The penultimate stage before completion is I always like to sign and date my floats before applying the final coat of lacquer, which protects the maker’s mark so to speak.
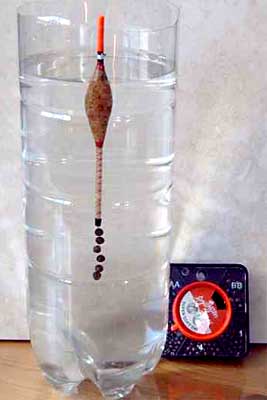
12. Setting Weights & Marking. The final stage in the creation of the float is to find the weight that the float will take and mark the weight on it. With experience, when you’re turning the float down on the lathe you can roughly guess what weight the final float will take by the amount you have taken off on the turning stage. With the aid of an old 2 litre Coke bottle with the top cut off and filled with water, I take the dried float and using a float rubber and some fishing line I attach them to the bottom of the float adding shot as I go to find the weight that the float will handle. Then using a silver paint pen I write the weight on the side of the float.
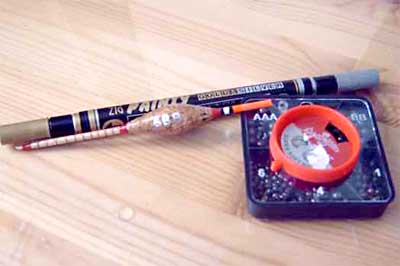
13. Marking the weight.
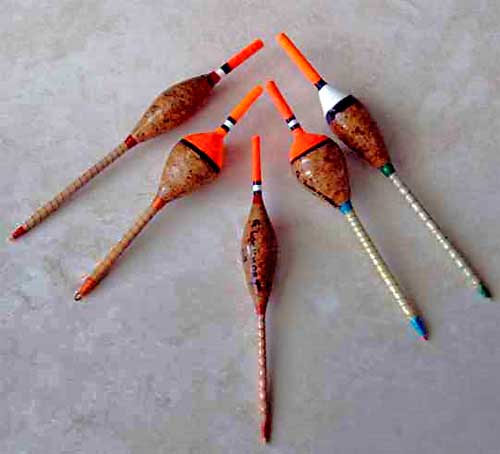
14. The completed float. The float in the centre is now complete. I have grouped it together with other floats, which were being made at the same time, to show the various shaped bodies you can achieve.
I hope this tutorial will help others make floats in the future as the shop bought floats of today have no heart nor soul in them and its certainly more satisfying creating your own floats. Anyone seeking my advice or information on floatmaking can contact me through Fishingmagic’s messaging system.
Tight Lines
George Lockhart


