On these cold winter days when many of us have eight inches of snow outside the front door you can always busy yourself refurbishing your tackle ready for the big thaw. One of the items you will sure to be needing, if like me you’re a keen pike angler, is traces, both for snap tackle (dead and live baits) and lure fishing.
I’ve been making my own traces for nigh on 35 years now and over that time I’ve tried all different methods of attaching the hooks to wire trace material. We’re more than blessed nowadays with additional items that make the finished job look far neater and actually assist in the job of making them.
Snap Traces
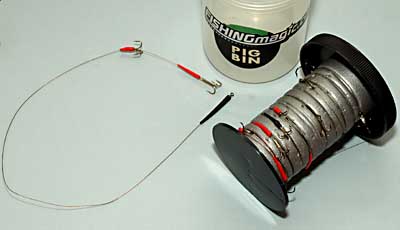
Let’s look first of all at the Snap Traces that you would typically use with a dead bait. In the headline picture you will see the bits and pieces that I will use. I’ll take you around them.
 |
| Crimp pliers and wire cutters also! |
A – crimp covers, these made by Prowla and available in red as well black. Some, like myself, feel that the red colour will aid the pike to target it’s prey, your bait. These only fit over the crimp, that’s all.
B – crimp covers that fit over the swivel also, again by Prowla and available only in black as these go at the top of the trace where it connects with the swivel. Other makes are available though.
C – the crimps themselves. Always make sure you buy them to fit the diameter of trace wire being used. Always allow a little larger one if you’re using a coated wire.
D – the hooks themselves. Here I’m using a Drennan semi-barbless variety, the barbed point goes into the bait leaving the barbless points to hook the pike.
E – treble sleeves, again by Prowla and available in red or black for different sizes of hook, 4s, 6s, and 8s. These will be used to cover the shank and wire on the intermediate hook only.
F – trace wire. Available in 7 or 49 strand from Prowla, but other makes are available coated and uncoated and 19 strand as well. For pike, I use a minimum of 30lbs on snap traces.
The one item I didn’t include in the picture that you will need is a large swivel, size 8 or 9.
Making Up
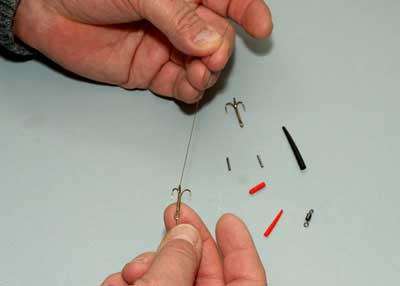
Step 1 – Unwind a length of wire from the spool of trace wire, about 20 inches (50cm) should be sufficient. Pass it through the eye of one of the trebles so that it extends beyond by about 7 or 8 inches.
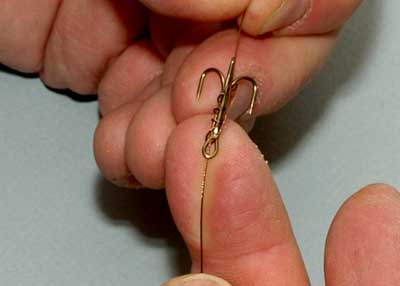
Step 2 – Fold the wire under the joining of the treble hooks and back up the shank. Holding the wire and hook tightly with one hand, wrap the wire tightly around the shank of the hook 3 or 4 times. You may find this a little difficult as the wire always wants to spring off. Before you let it go, though, pass the loose end through the eye of the treble again.
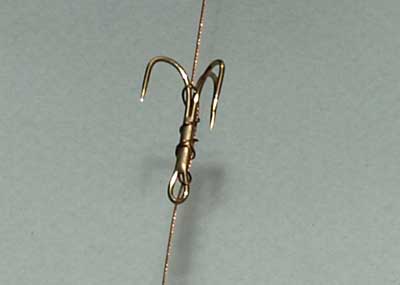
Step 3 – I like to pass this loose end now through the small loop created when you folded the wire under the joint of the trebles in step 2 (see also diagram). This just tucks the loose end tightly to the shank of the treble. Some anglers like to pass it through all the wraps along the shank, but once the cover (step 4) is fitted this no longer matters, in my opinion.
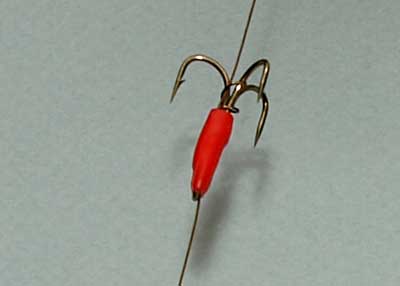
Stage 4 – At this stage you can decide how long you want the finished trace to be and cut the wire from the main spool. At least 15 inches and more likely 18-20 inches would be preferred. Onto that new end, pass on a Treble Cover in whichever size and colour you prefer. Push it along until it goes over the shank of the treble and the flatter end is just covering the eye of the hook.
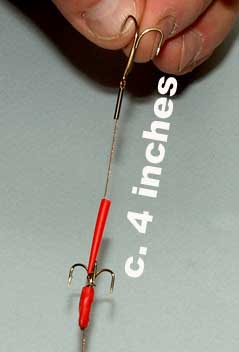
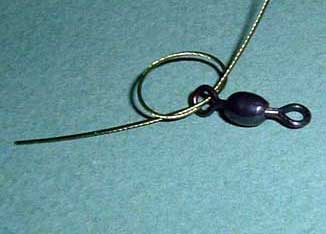
Step 5 – That’s the intermediate hook done. Now to the end hook, push on a small crimp cover, again whichever colour red or black, and also a crimp for the wire. Pass the wire through the eye of the hook and back onto itself leaving around 4 inches between both hooks. Some anglers like to go through the eye twice and I have done this in the past putting in an overhand knot also (see above right), but I found lately that it isn’t necessary and adds no further strength to the finished item.
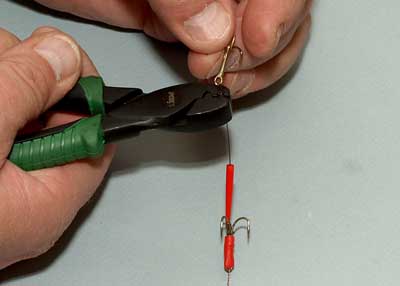
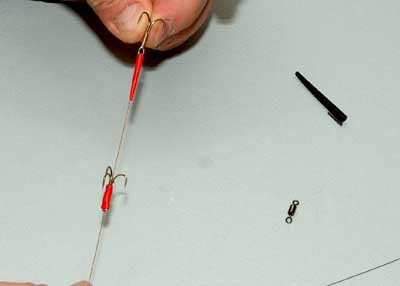
Step 6 – Cut the folded over piece so that it leaves enough wire to be covered by the crimp and no more. Now using crimping pliers (use normal pliers at a pinch, but they’re not as good), press down hard to seal the crimp. Push the crimp cover over the crimp and UP TO (not over) the hook’s eye.
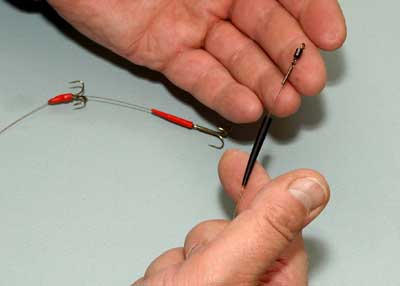
Step 7 – This is similar to Step 6, but instead of the hook, you’ll attach a swivel. So push on a large crimp cover (only in black) and a crimp and pass the end of the wire through the swivel’s eye. Fold back and cut to length, as before, and use the crimping pliers to seal it. This time, pass the crimp cover over the crimp and eye and halfway up the barrel of the swivel for a really neat job.
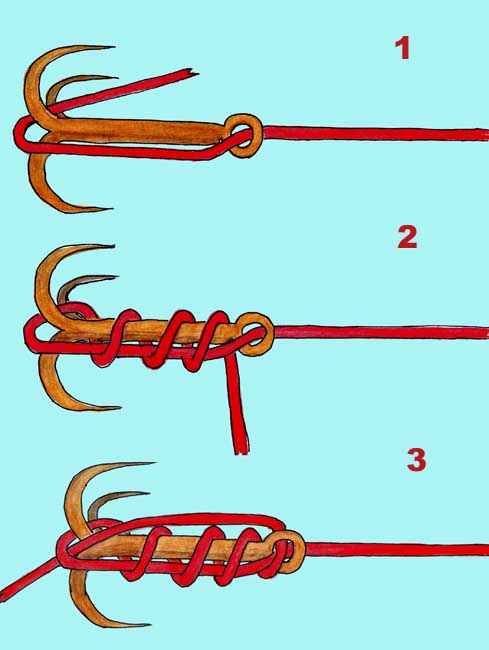 Now, just a word about those wraps around the shank in step 2. Look at the diagram and you will see that the wire from the rod is straight until it fold under the hook. Also from where it comes back out of the eye to the end hook, it is also straight. The wraps are in the middle where there will be no straining and this, I believe, leads to the strongest possible wire trace.
That’s it, your snap trace all made up. The beauty of doing it yourself is that you control the choice of hooks and materials. If the trace develops a problem you only have yourself to blame, mostly, and you can remedy that when you make another.
Store your traces in a Rig Bin (yes, mine says “Pig Bin” thanks to one of my kids artistic work with a permanent marker many years ago) where they will keep out of harms way and the hooks cannot be blunted.
Lure Traces
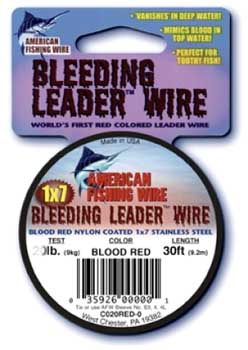 I’ve been through these before in one of my ‘In A Spin’ series, but it does no harm to include it again here. With these I prefer to use coated wire materials, one in particular is Bleeding Leader Wire, which is red in colour and very strong in 30 or 45 lbs tests and available from Eddie Turner’s site. You’ll find other AFW wires including titanium on his site too, excellent quality that will do either trace jobs.
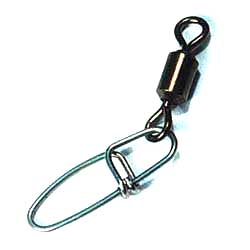 The other item you will need is a Fox Safe-Lok Link Swivel to hold the lure. Everything else you have for the snap trace, but you may want a bigger size crimp because of the stronger or coated wire you normally use when lure fishing.
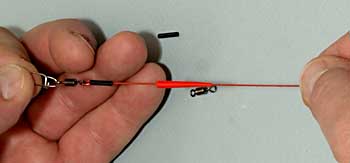
Step A – step is identical to step 6 above only now you are using the Safe-Lok Link Swivel. Again, you could use the double loop through and overhand knot if you wished.
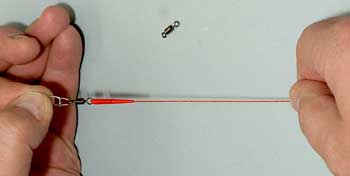
Step B – The small red (or black) crimp cover is pushed down to the eye of the swivel, but not over it.
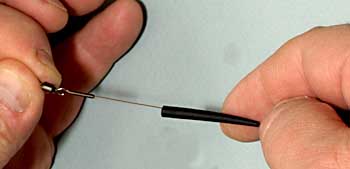
Step C – at the opposite end is just a normal swivel, but with the large black crimp cover over it, same as in step 7 above. You should find these crimp covers helpful in keeping off weed and making the entire trace much neater and streamlined.
That’s all there is to making lure traces, but check the Safe-Lok from time to time to see that it isn’t suffering fatigue, you don’t want to lose a monster pike and a lure for the sake of a fresh trace.


