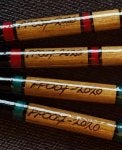
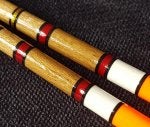
Float making.

no-one in particular

Well-known member
Joined
Feb 1, 2008
Messages
7,783
Reaction score
3,780
Location
australia
I have given them a rub down with rough and then fine sand paper, then a wash in soapy water. Now the hard bit painting them, should be embarrassing but that can wait until tomorrow or the weekend.
 
Last edited:

no-one in particular

Well-known member
Joined
Feb 1, 2008
Messages
7,783
Reaction score
3,780
Location
australia
I started to paint these floats, the yellow; and I was not too happy. I think they need to be as they were or made new. The trouble is the yellow paint is too thick and I would have to put on lots of layers to make it look smooth. So I bought some nail varnish remover and started to try this, it is going to ba laborious job and the other problem is the white paint under the yellow seems to be a different paint. The acrylic comes off, it is working on the green and the yellow but not the white paint underneath, I am guessing this might be some sort of ordinary gloss, what could I use to get rid of that?
 

Aknib

Well-known member
Joined
Jul 23, 2019
Messages
1,874
Reaction score
2,873
Location
Isle of Onamower
Without sanding all the way back I'm struggling to see how you'll get rid of the troublesome non-stick layer of paint Mark, I would sand lightly just to disrupt the smooth surface and then undercoat with a dedicated white undercoat which will seal the base and help your top coat stick.

Don't worry too much about them not looking any good during the first coats, that's usually the case and there's nothing wrong with dolloping on several to get opacity, sanding lightly and then final coating.

It's a bit of a faith thing at this stage and you have to keep going with it.

I hope you do as the evidence of the original paint, where the depth differs, will retain their character and bring something back to a good and useful working life that would likely have otherwise been lost.
 

no-one in particular

Well-known member
Joined
Feb 1, 2008
Messages
7,783
Reaction score
3,780
Location
australia
Without sanding all the way back I'm struggling to see how you'll get rid of the troublesome non-stick layer of paint Mark, I would sand lightly just to disrupt the smooth surface and then undercoat with a dedicated white undercoat which will seal the base and help your top coat stick.

Don't worry too much about them not looking any good during the first coats, that's usually the case and there's nothing wrong with dolloping on several to get opacity, sanding lightly and then final coating.

It's a bit of a faith thing at this stage and you have to keep going with it.

I hope you do as the evidence of the original paint, where the depth differs, will retain their character and bring something back to a good and useful working life that would likely have otherwise been lost.

I have started so I will finish it Aknib, got the time after-all!
I bought some oven cleaner today, couldn't get paint stripper, I have used oven cleaner on old varnish and it works a treat but not this paint (the white), didn't soften it or anything. Tried some white spirit rubbed with a cloth, same, doesn't work on this white paint. So, I am thinking of giving some coats of white gloss, I have some of that, it is thicker than the acrylic paint which I can use as the top coats, what do you think, ordinary white gloss might cover the joins. Otherwise I can keep applying coats of acrylic but the more I put on the more I will cock it up, already have more on my fingers than the floats:)
Stay with me, we will get through this and thanks.:)
 

Aknib

Well-known member
Joined
Jul 23, 2019
Messages
1,874
Reaction score
2,873
Location
Isle of Onamower
I reckon go with what you think Mark, I've never used gloss and you're obviously thinking it through so it may well work.

Just to prove what I was saying about paint often looking a bit crabby during the early stages...


uplifting poems
 

bracket

Well-known member
Joined
Feb 11, 2013
Messages
1,501
Reaction score
657
Location
Dorset
Floats always catch the angler's eye and the wonderful examples on this thread are no exception. Both modern and traditional varieties are displayed. This is an attempt to look beyond the image of floats, with a view to discover what prompts their designs. For example, when using basic quills to make wagglers, then length is proportional to shotting capacity, plus extra length will help sink the line and minimise the wind effect. That is a pretty obvious statement, until you add a cork/balsa body. What determines the dimensions then, bearing in mind the wind/length thing? Similarly the with river floats. Shallow water calls for short floats and fishing shallow water at distance dictates short chunky floats, again straight forward. Deep water equals bigger floats carrying more lead. Here again Avon floats with cork /balsa bodies. So when making floats what rule of thumb or yardstick do you use or do you just follow traditional proportions. When I make stick floats I use a ratio of 1:2 in respect of body to stem, but it's not based on any float design physics. Thoughts anyone? Pete.
 

Aknib

Well-known member
Joined
Jul 23, 2019
Messages
1,874
Reaction score
2,873
Location
Isle of Onamower
Good observations Pete and the question of proportion was something which baffled me to begin with considering the amount of different patterns and purposes.

It's not so much an issue for me as I tend to make sets of three, four and five depending on the pattern and so I will have a range of sizes/weights to match to the conditions and swims.

Two things I will say though, and it won't sound very scientific, is that one I tend to go with what looks right and two I don't make to rounded up shot capacities eg. 3bb, 2AAA etc., I'm happy enough to trim each one up with whatever I need to add whilst knowing i'll have the size I need within the set.
 

no-one in particular

Well-known member
Joined
Feb 1, 2008
Messages
7,783
Reaction score
3,780
Location
australia
Without sanding all the way back I'm struggling to see how you'll get rid of the troublesome non-stick layer of paint Mark, I would sand lightly just to disrupt the smooth surface and then undercoat with a dedicated white undercoat which will seal the base and help your top coat stick.

Don't worry too much about them not looking any good during the first coats, that's usually the case and there's nothing wrong with dolloping on several to get opacity, sanding lightly and then final coating.

It's a bit of a faith thing at this stage and you have to keep going with it.

I hope you do as the evidence of the original paint, where the depth differs, will retain their character and bring something back to a good and useful working life that would likely have otherwise been lost.

I will experiment with the gloss tomorrow and then if that fails I will just press on with removing the old acrylic and sandpaper then try and build up with new coats of acrylic, I might be some-time and might die first or have no fingers left but thanks.
 

no-one in particular

Well-known member
Joined
Feb 1, 2008
Messages
7,783
Reaction score
3,780
Location
australia
Tried a test coat of white gloss on a couple of the other floats, probably looking like the favorite option. Noticed two smears of paint on my window pane, b***** knows how they got there but, press on regardless.
 

no-one in particular

Well-known member
Joined
Feb 1, 2008
Messages
7,783
Reaction score
3,780
Location
australia
How are the floats coming along Mark, any progress?

I have not got round to it yet, still sitting on my table where I last left off. I will do though over the next few days, I bet your shed's coming along better and will probably look better if your floats are anything to go by. I will post some pictures once I got the next stage done but I wish i could just remove all the old paint and do them from scratch, I am sure they would look better.
 

Paste paul

Well-known member
Joined
Mar 6, 2020
Messages
305
Reaction score
201
Location
Sheffield
I love this thread..... some really talented people out there ......
I’ve made floats over the years although usable they don’t always look pretty.
Keep up the good work guys
 

purplepeanut007

Well-known member
Joined
Jan 14, 2012
Messages
264
Reaction score
468
Location
Manchester
Handcrafted Floats By Mike Cootes (PP007): CHUNKY BALSA WAGGLERS

Hi all,
With a some time on my hands I have tried something a little different.
The four balsa wagglers you see below.

These are quiet wide at 8 mm.The shorter tipped two are for pellet fishing on commercials and club lakes.
The two with longer tips are for rivers using bigger baits like bread, paste, worm etc

To be honest I just made the bodies, stained and painted all four, then free styled with a few ideas until I settled with the two designs you see before you.

Read and see more on the blog. ??????

20200401_073418.jpg

20200401_073858.jpg

20200405_103123.jpg
 

no-one in particular

Well-known member
Joined
Feb 1, 2008
Messages
7,783
Reaction score
3,780
Location
australia
Found this on the way home, a ready made float. Its a drumstick pen by SUCK UK, how do they get those names! It is heavy so will make a nice weighted float for casting. I also fancy shoving some split shot up the ready made hole to make it a bit self cocking and more casting weight, add some paint and a ring and it's done. And never thought of this before, my brother plays the drums and he is always nicking my fishing gear so now I can nick all his drumsticks.
 
Last edited:

rayner

Well-known member
Joined
Nov 9, 2015
Messages
4,862
Reaction score
2,053
Location
South Yorkshire.
I have made myself 10 balsa wagglers, 8 Peacock wagglers some with inserts some without. Now need painting, how I will manage that is yet to be decided. I have the paint and a brush, now just need a method. Far from a professional finish, may be improved with a little paint. Much better than the industrial versions I was doing before. I suppose my technique is improving.
You never know I may even get a chance to use one or two.
 

ian g

Well-known member
Joined
Jul 21, 2011
Messages
1,762
Reaction score
1,876
Location
North Shropshire
I've made dozens over the lock down period , I find it therapeutic . I've made perch bobbers , onion floats , bolos , loaded sarkanda reed wagglers and insert peacock wagglers . They're a bit rough and ready but functional . Just a question I've been meaning to ask , what varnish do you use ? I'm using acrylic paint , not sure that makes a difference

Thanks Ian
 

Aknib

Well-known member
Joined
Jul 23, 2019
Messages
1,874
Reaction score
2,873
Location
Isle of Onamower
I've been meaning to ask , what varnish do you use ? I'm using acrylic paint , not sure that makes a difference

Thanks Ian

I use acrylics more than anything Ian, along with Morrell's varnish but you'll have trouble buying it nowadays in anything less than (iirc) 5 litres which will be around forty quid.

Thirsk Decorating Centre used to split it down into 1 litre bottles and sell those but following some sort of restructuring of the business they no longer do such a small quantity by post.

You'll likely have a Morrell's dealer near you if you search their website, the stuff is called 'Severe Use' which is a waterborne lacquer and is great to use having no odour, drying within minutes, you can rinse your brush out easily with water and a it has a very durable and long lasting finish.

You can specify the amount of sheen too, these are the product codes for the stuff I use...


If you were any nearer and it was practical I'd go halves with you.
 

rich66

Well-known member
Joined
Nov 9, 2015
Messages
891
Reaction score
492
Location
Leicestershire
I’ve repaired a couple and made 3 over the last few days. I use mainly enamels so don’t normally bother with a varnish.
Couple of goose quills I have varnished with polyurethane.
24a83c774a9a44fb1f20c7e1cc1f8383.jpg
 
Top